
In my ongoing series on customizing QuickBooks, I will cover in this blog post how to customize invoice in QuickBooks Online.
First, access the sales settings by clicking on the Gear Icon on the upper right.
Click Company Settings.

Click on Sales settings on the left.

Click on Customize Look and Feel to customize invoices and other sales forms in QuickBooks Online.

Click on the New Style button to add a new sales form.

The Customize form style will open

1. Click on the Style button on the left
2. Choose whether you will customize an invoice, estimate, or sales receipt
3. Select the form styles from:
4. Click on the pencil icon to name your form
5. Click on the logo field to upload your logo
6. Click on the colors to update the colors on your form
Click Save when you’re done with this section.
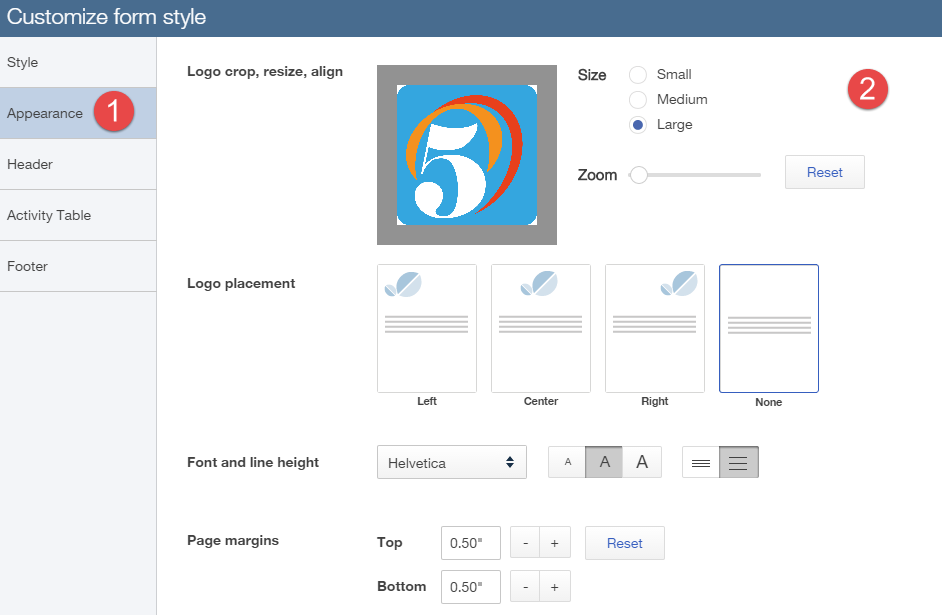
1. Click on Appearance on the menu on the left.

2. The Customize form style will open. Make the appropriate selections to:
Click Save when you’re done with this section.
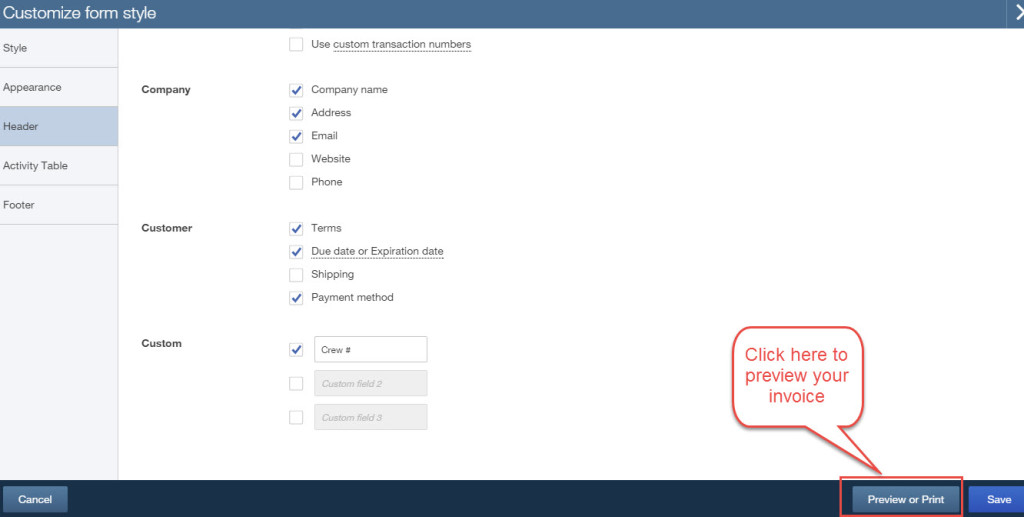
1. Click on Header on the menu on the left.

Click on the pencil icon to add or edit any options.
I highly recommend that you include payment terms and a due date so that your customers will know exactly when they need to pay you.
At any time, you can preview your invoice to see how it looks. Just click on Preview or Print at the bottom right of the screen.

Click Save when you’re done with this section.
To customize the details of the products/services that you see on your invoices, you should customize the Activity Table. This would include item codes and descriptions, quantity, rate, amounts.
You’ll also be able to customize the column widths and the order in which the columns should show on the invoice.
For professional services invoices, you can also indicate whether you want to group activities together – such as staff working on the same service/activity code, whether to show markup on billable expenses, and whether you want to include details for billable time, such as including employee name, and including hours and rate.
I recommend that you play around with the customization until you find the format that you want. Remember to preview the invoice by clicking on Preview or Print on the bottom right hand corner.
Select Activity Table from the left to open these preferences. Make selections as needed.

Click Save when you’re done with this section.
You can add a message to your customers thanking them for their business, wishing them Happy Holidays, requesting referrals, etc.
There are two fields: a message to customers, and a footer.
Select Footer from the left to open the window.
The Message to Customer prints at the bottom left of the Activity Table.
The Footer prints at the very bottom on the invoice.

Click Save when you’re done with this section.
Click on the X on the upper left to close the window when you are done.
Here’s a Slideshare presentation for you:
I hope that this helps you to learn how to customize invoices in QuickBooks Online. The first time that I customized my invoice, it took me a couple of hours – I guess I am a perfectionist! Be patient and you too can customize your invoice just the way you want it.
Any comments or suggestions? Please type them down below in the comments section.